Squeezing some extra performance out of your GPU investment is not particularly difficult. With tools such as MSI Afterburner, anyone can overclock their graphics card in a few simple steps. Here’s how.
 If you’re a gamer, there is no more effective way of boosting your frame rates than overclocking your GPU, short of buying a new one. Overclocking other components such as the CPU or RAM makes very little difference to your frame rate (FPS) in comparison.
It’s impossible to know exactly how much extra performance you can get out of overclocking, but up to a 15% performance increase is not unheard of.
So it’s obvious that you can get some additional value out of your GPU investment by overclocking. All GPUs are individually different – some will go a lot higher than others even with the exact same chip, card and cooling.
Do note that overclocking is not entirely risk-free. Although it is very uncommon for hardware to be damaged from overclocking, you do it at your own risk.
Overclocking software options
First you need to download the tools of the trade. MSI Afterburner is one of the best options and works with both Nvidia and AMD GPUs. You could also try EVGA Precision (Nvidia only) or Asus GPU Tweak (or still others), but we will use Afterburner in this guide. You don’t need an MSI graphics card to use the tool, it should work with any brand.
What makes Afterburner a good choice is that MSI has included some additional useful features, such as an OSD overlay and logging.
You will also need:
Fire up the Afterburner
There’s an assortment of controls and gauges in Afterburner that you should get to know first. By default, a real-time temperature graph is drawn below the gauges and you will also see clock changes in real time. Modern GPUs such as Turing, Pascal, Polaris or Vega will not run at maximum clocks constantly but change over time, just like processors.

MSI Afterburner basically consists of two panes, up/down or left/right depending on what skin you use (change it under settings > user interface). The left/upper pane contains controls and settings. Under that or on the right, a pane that can be detached displays information about the graphics card’s current status. It also monitors CPU and RAM activity.

Before doing anything else, make sure that Afterburner starts with Windows. Also note the profiles on the bottom right that you will be using to save settings, and the option to apply the settings on startup at the other end. Click the floppy disk icon to save a profile, and the Windows button to apply on startup. Once you have a working overclock, you will probably want to have all of these settings activated right away.
 GPU core and graphics memory clock frequencies can be adjusted in the main window, as well as a target temperature. But it is also possible to create your own fan curve, making it possible to find a good balance between temperature and noise level. Fan curves can be adjusted in the settings menu.
Voltage control is a setting that allows MSI Afterburner to increase or decrease the voltage to the graphics card. It unfortunately doesn’t work with all graphics card. Even if it works, voltage adjustments often introduce instabilities, so we will leave those settings alone in this guide.
Hover with your mouse pointer on the app’s various functions to get info on what they do.
Establish your baseline performance
It’s important to test each new setting to ensure that it’s stable for longer periods, i.e. gaming. However, firing up a game or more comprehensive benchmark each time is a recipe for frustration.
Instead, use Furmark, an excellent tool for stability testing. It delivers a constant, high workload to the GPU. Alternatively you can install MSI’s Kombustor tool, which is the same thing but has its own button in Afterburner for easy access.

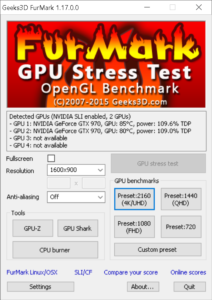
You will also need this for reference, in order to see how the graphics card behaves using stock settings versus overclocked. So start by running Furmark for ten minutes and take note of the card’s maximum clock frequencies and temperatures.
Don’t run the preset GPU benchmarks, just run Furmark’s GPU stress test in a window, with the same resolution each time. You don’t need to compare your results with anyone else’s but your own at stock speeds.
Power limit and clocks: let’s increase them
Now you are ready to start applying some higher clocks. Overclocking modern graphics cards is a simple process. As long as the cooling is sufficient, it is only a matter of increasing the controls to the highest level that works.
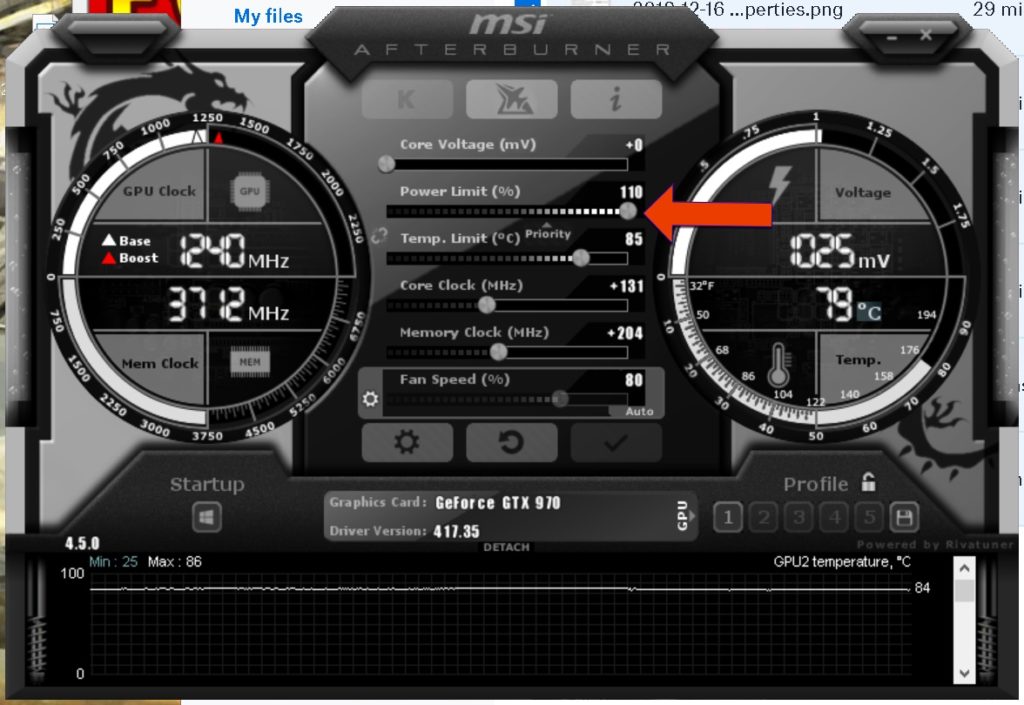
- Start by increasing the power limit, to allow the GPU to consume more power. Otherwise it will throttle to keep power consumption in line even if it can actually handle much higher clocks. Just max it out right away.
- You may notice that the temp-limit slider is linked. If so, unlink it if you want to keep the temperature within reasonable bounds. This will of course increase fan speed and noise to compensate.
- Now shift the GPU core frequency upwards. Start by making a jump of perhaps 100 MHz and test for stability with Furmark for another 10 minutes.
- If there is no crash – or apparent errors in the image quality such as artifacts, lines, or strange-looking pixels during this time – you have probably found a new minimum. Save it as your first profile.
- Now you can keep Furmark running in the background, while adjusting the clock in smaller increments of about 10 MHz at a time. Keep watching for errors and repeat this process until you do begin to experience problems. Then dial back a bit and save your profile again.
- When you find the maximum frequency for the graphics core, it time to start over and redo the same process with the graphics memory. Increase the clock frequency until instability occurs, then dial back a bit and save.
Congratulations, now you have a faster graphics card and didn’t cost you a nickel!
Now that you have stable, higher frequencies, you can bring out the heavy artillery in the form of 3DMark. Or just run your actual games to verify that performance is actually better.
Use, for example, Steam’s FPS overlay or FRAPS to check frame rates in real time with versus without the overclock applied.
Different GPUs, different results
It may be worth pointing out yet again that there are many factors affect overclocking potential, such as the individual graphics chip, the cooling of the graphics card, GPU model and so on.
The settings may look slightly different between graphics card models, but the basic procedure in MSI Afterburner is still the same.
With Nvidia’s new Turing architecture in the Geforce RTX series, an overclocking feature is introduced in MSI Afterburner called Afterburner OC Scanner. In short, it’s automatic overclocking of the graphics card. We haven’t tried it but it might be worth testing out.
All in all, overclocking a graphics card is easy. It’s a bit harder to squeeze out lots of extra performance from today’s heavily optimized GPUs compared to older models, but some performance gains are nearly always there for the taking.
Another thing to keep in mind is that higher frequencies will bring increased heat and power consumption. This is usually not much of an issue during shorter gaming sessions, but could be somewhat problematic in small form factor builds.